· 13 min read
Securing MCP Servers: A Practical Guide with Keycloak (using create-mcp-server)
Learn how to secure your MCP servers with OAuth authentication using Keycloak. A hands-on guide using create-mcp-server to scaffold production-ready, authenticated MCP servers.
Copy a command, then paste it into the command palette (Ctrl K to open).
Introduction
MCP servers are powerful. They let AI agents interact with databases, APIs, file systems, and virtually anything you can imagine. But there's a catch: most tutorials show you how to build MCP servers without authentication.
That's fine for local development. It's a problem for production.
An unsecured MCP server is an open door. Anyone who discovers your endpoint can invoke your tools, access your resources, and potentially wreak havoc on your systems. As MCP adoption grows and servers move from localhost to cloud deployments, security isn't optional anymore.
The good news? The MCP Authorization specification provides a standard way to secure MCP servers using OAuth 2.1. And with the right tools, implementing it is straightforward.
In this guide, you'll learn:
- How MCP authorization works (without the jargon)
- How to scaffold a secure MCP server with
create-mcp-server - How to set up Keycloak as your OIDC provider
- How to test your authenticated server with VS Code, Cursor and a terminal client
Let's lock down your MCP server.
Understanding MCP Authorization
If you're new to MCP, here's the short version: the Model Context Protocol is an open standard that lets AI assistants discover and use external tools. Think of it as a universal adapter between AI models and the real world. For a deeper dive, check out our article on running MCP servers with Docker.
Why Security Matters
When you deploy an MCP server, you're exposing capabilities to the network. Those capabilities might include:
- Reading and writing to databases
- Sending emails or notifications
- Accessing internal APIs
- Managing cloud resources
Without authentication, anyone can call these tools. That's why the MCP specification includes authorization as a core feature.
OAuth: The Hotel Key Card
OAuth might sound intimidating, but the concept is simple. Think of it like a hotel key card system:
- You check in at the front desk (authentication)
- You receive a key card (access token)
- You use the key card to access your room (authorized requests)
- The door checks if your card is valid (token validation)
That's OAuth in a nutshell. The MCP client gets a token from an authorization server, then includes that token with every request. The MCP server validates the token before granting access.
The MCP specification requires OAuth 2.1 with PKCE (Proof Key for Code Exchange), which adds an extra security layer to prevent token interception. You don't need to understand the cryptographic details, just know that it's a modern, secure approach.
Dynamic Client Registration (DCR)
Here's something important that often gets overlooked: Dynamic Client Registration.
In traditional OAuth setups, you manually register each client application with your authorization server. You create a client, get a client ID and secret, and configure them in your app. This works fine when you have a handful of known clients.
But MCP is different. The whole point is that any MCP-compatible client should be able to connect to your server. Claude Desktop, VS Code, Cursor, custom agents, there could be dozens of different clients trying to connect.
DCR solves this. It allows clients to register themselves automatically with the authorization server. No manual setup required. The client says "hey, I'd like to connect," and the server says "here are your credentials."
This is critical for the MCP ecosystem to scale. And it's one of the main reasons we're using Keycloak: Keycloak fully supports Dynamic Client Registration. Not all OIDC providers do. If you're evaluating alternatives like Auth0, Azure AD, or Okta, check their DCR support carefully.
For the complete technical specification, see the MCP Authorization documentation.
Introducing create-mcp-server
Building an MCP server from scratch with OAuth is tedious. You need to set up Express, configure middleware, handle token validation, manage sessions, and wire up SSE for real-time updates. That's hours of boilerplate before you write a single tool.
create-mcp-server eliminates that friction. It's a CLI tool that scaffolds production-ready MCP servers in seconds:
npx @agentailor/create-mcp-server
The CLI walks you through a few questions and generates a complete project with TypeScript, Express.js, and optionally OAuth authentication baked in.
Two Templates
| Feature | Stateless | Stateful |
|---|---|---|
| Session management | — | ✓ |
| SSE support | — | ✓ |
| OAuth option | — | ✓ |
| Endpoints | POST /mcp | POST, GET, DELETE /mcp |
Stateless: Each request creates a new transport instance. Simple, but no session persistence.
Stateful: Sessions are maintained across requests. Supports Server-Sent Events for real-time updates. This is what you need for OAuth.
For this guide, we'll use the Stateful template with OAuth enabled.
Scaffolding Your Secure MCP Server
Let's create our server. Run the CLI and answer the prompts:
npx @agentailor/[email protected]
Note: If you are using v0.3.0 or later, you'll have a new prompt for selecting a framework. To follow this article, you should select the official SDK.
When prompted:
- Enter (y) for npx to download the package
- Project name:
my-secure-mcp-server - Template:
Stateful - Enable OAuth:
Yes - Package manager: Your preference (npm, pnpm, or yarn)
The CLI generates this structure:
my-secure-mcp-server/
├── src/
│   ├── server.ts     # MCP server (tools, prompts, resources)
│   ├── index.ts      # Express app and transport setup
│   └── auth.ts       # OAuth middleware
├── package.json
├── tsconfig.json
├── .gitignore
├── .env.example
└── README.md
Key Files Explained
src/server.ts: This is where you define your MCP tools, prompts, and resources. It's the "business logic" of your server.
src/index.ts: The Express application. It sets up routes, applies middleware, and manages the HTTP transport.
src/auth.ts: The OAuth middleware. This is provider-agnostic, it works with any OIDC-compliant authorization server. You configure the provider through environment variables.
.env.example: Template for required environment variables:
PORT=3000

# OAuth Configuration
# Issuer URL - your OAuth provider's base URL
# Examples:
#   Auth0: https://your-tenant.auth0.com
#   Keycloak: http://localhost:8080/realms/your-realm
OAUTH_ISSUER_URL=https://your-oauth-provider.com

# Audience - the API identifier (optional, but recommended)
# This should match the "aud" claim in your JWT tokens
OAUTH_AUDIENCE=https://your-mcp-server.com
Install dependencies and you're ready to configure Keycloak:
cd my-secure-mcp-server
npm install
AGENT BRIEFINGS
What actually matters for building and scaling AI agents in production — and what's just hype. Straight from the work, no filler.
Setting Up Keycloak
We're using Keycloak as our OIDC provider. Here's why:
- Open-source: No vendor lock-in, full transparency
- OIDC-compliant: Works with any OAuth 2.1 / OpenID Connect client
- Supports DCR: Dynamic Client Registration out of the box
- Self-hosted: Complete control over your auth infrastructure
- Battle-tested: Used by enterprises worldwide
Running Keycloak with Docker
From your terminal, run the following command to start the Keycloak container:
docker run -p 127.0.0.1:8080:8080 -e KC_BOOTSTRAP_ADMIN_USERNAME=admin -e KC_BOOTSTRAP_ADMIN_PASSWORD=admin quay.io/keycloak/keycloak start-dev
Wait a minute for startup, then access the admin console at http://localhost:8080.
Configuring Keycloak
admin / admin, then follow these steps: 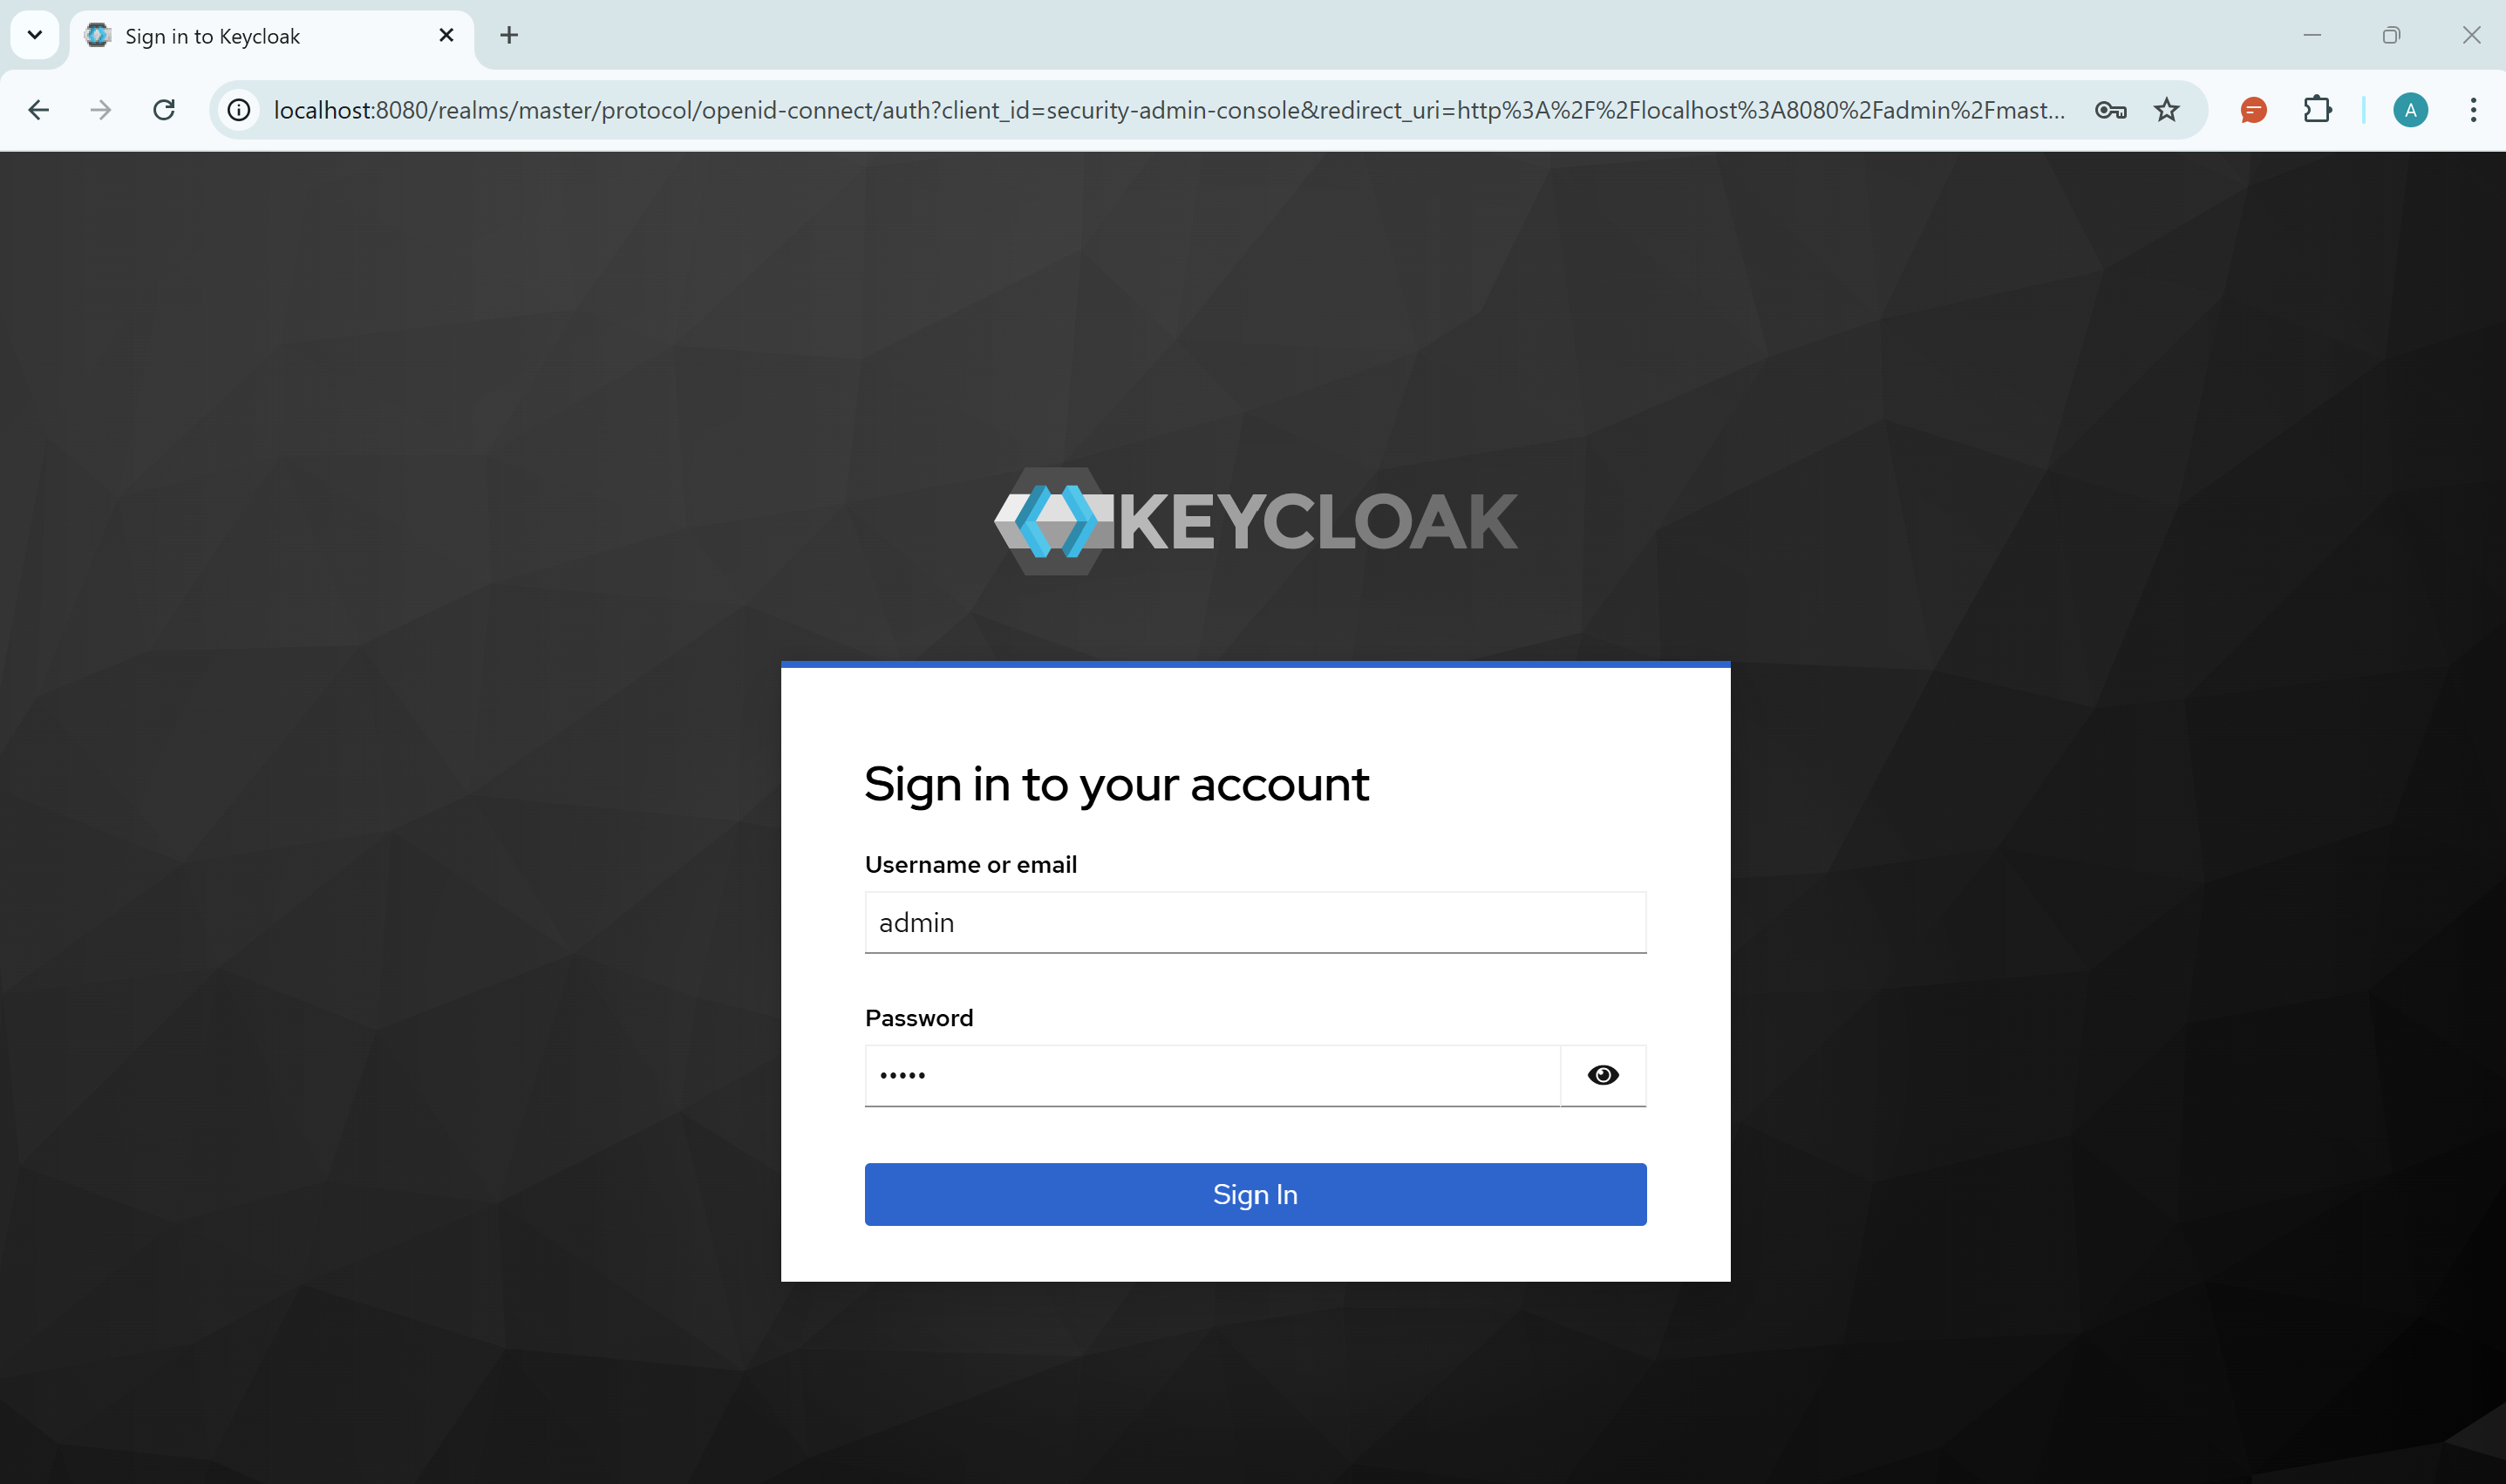
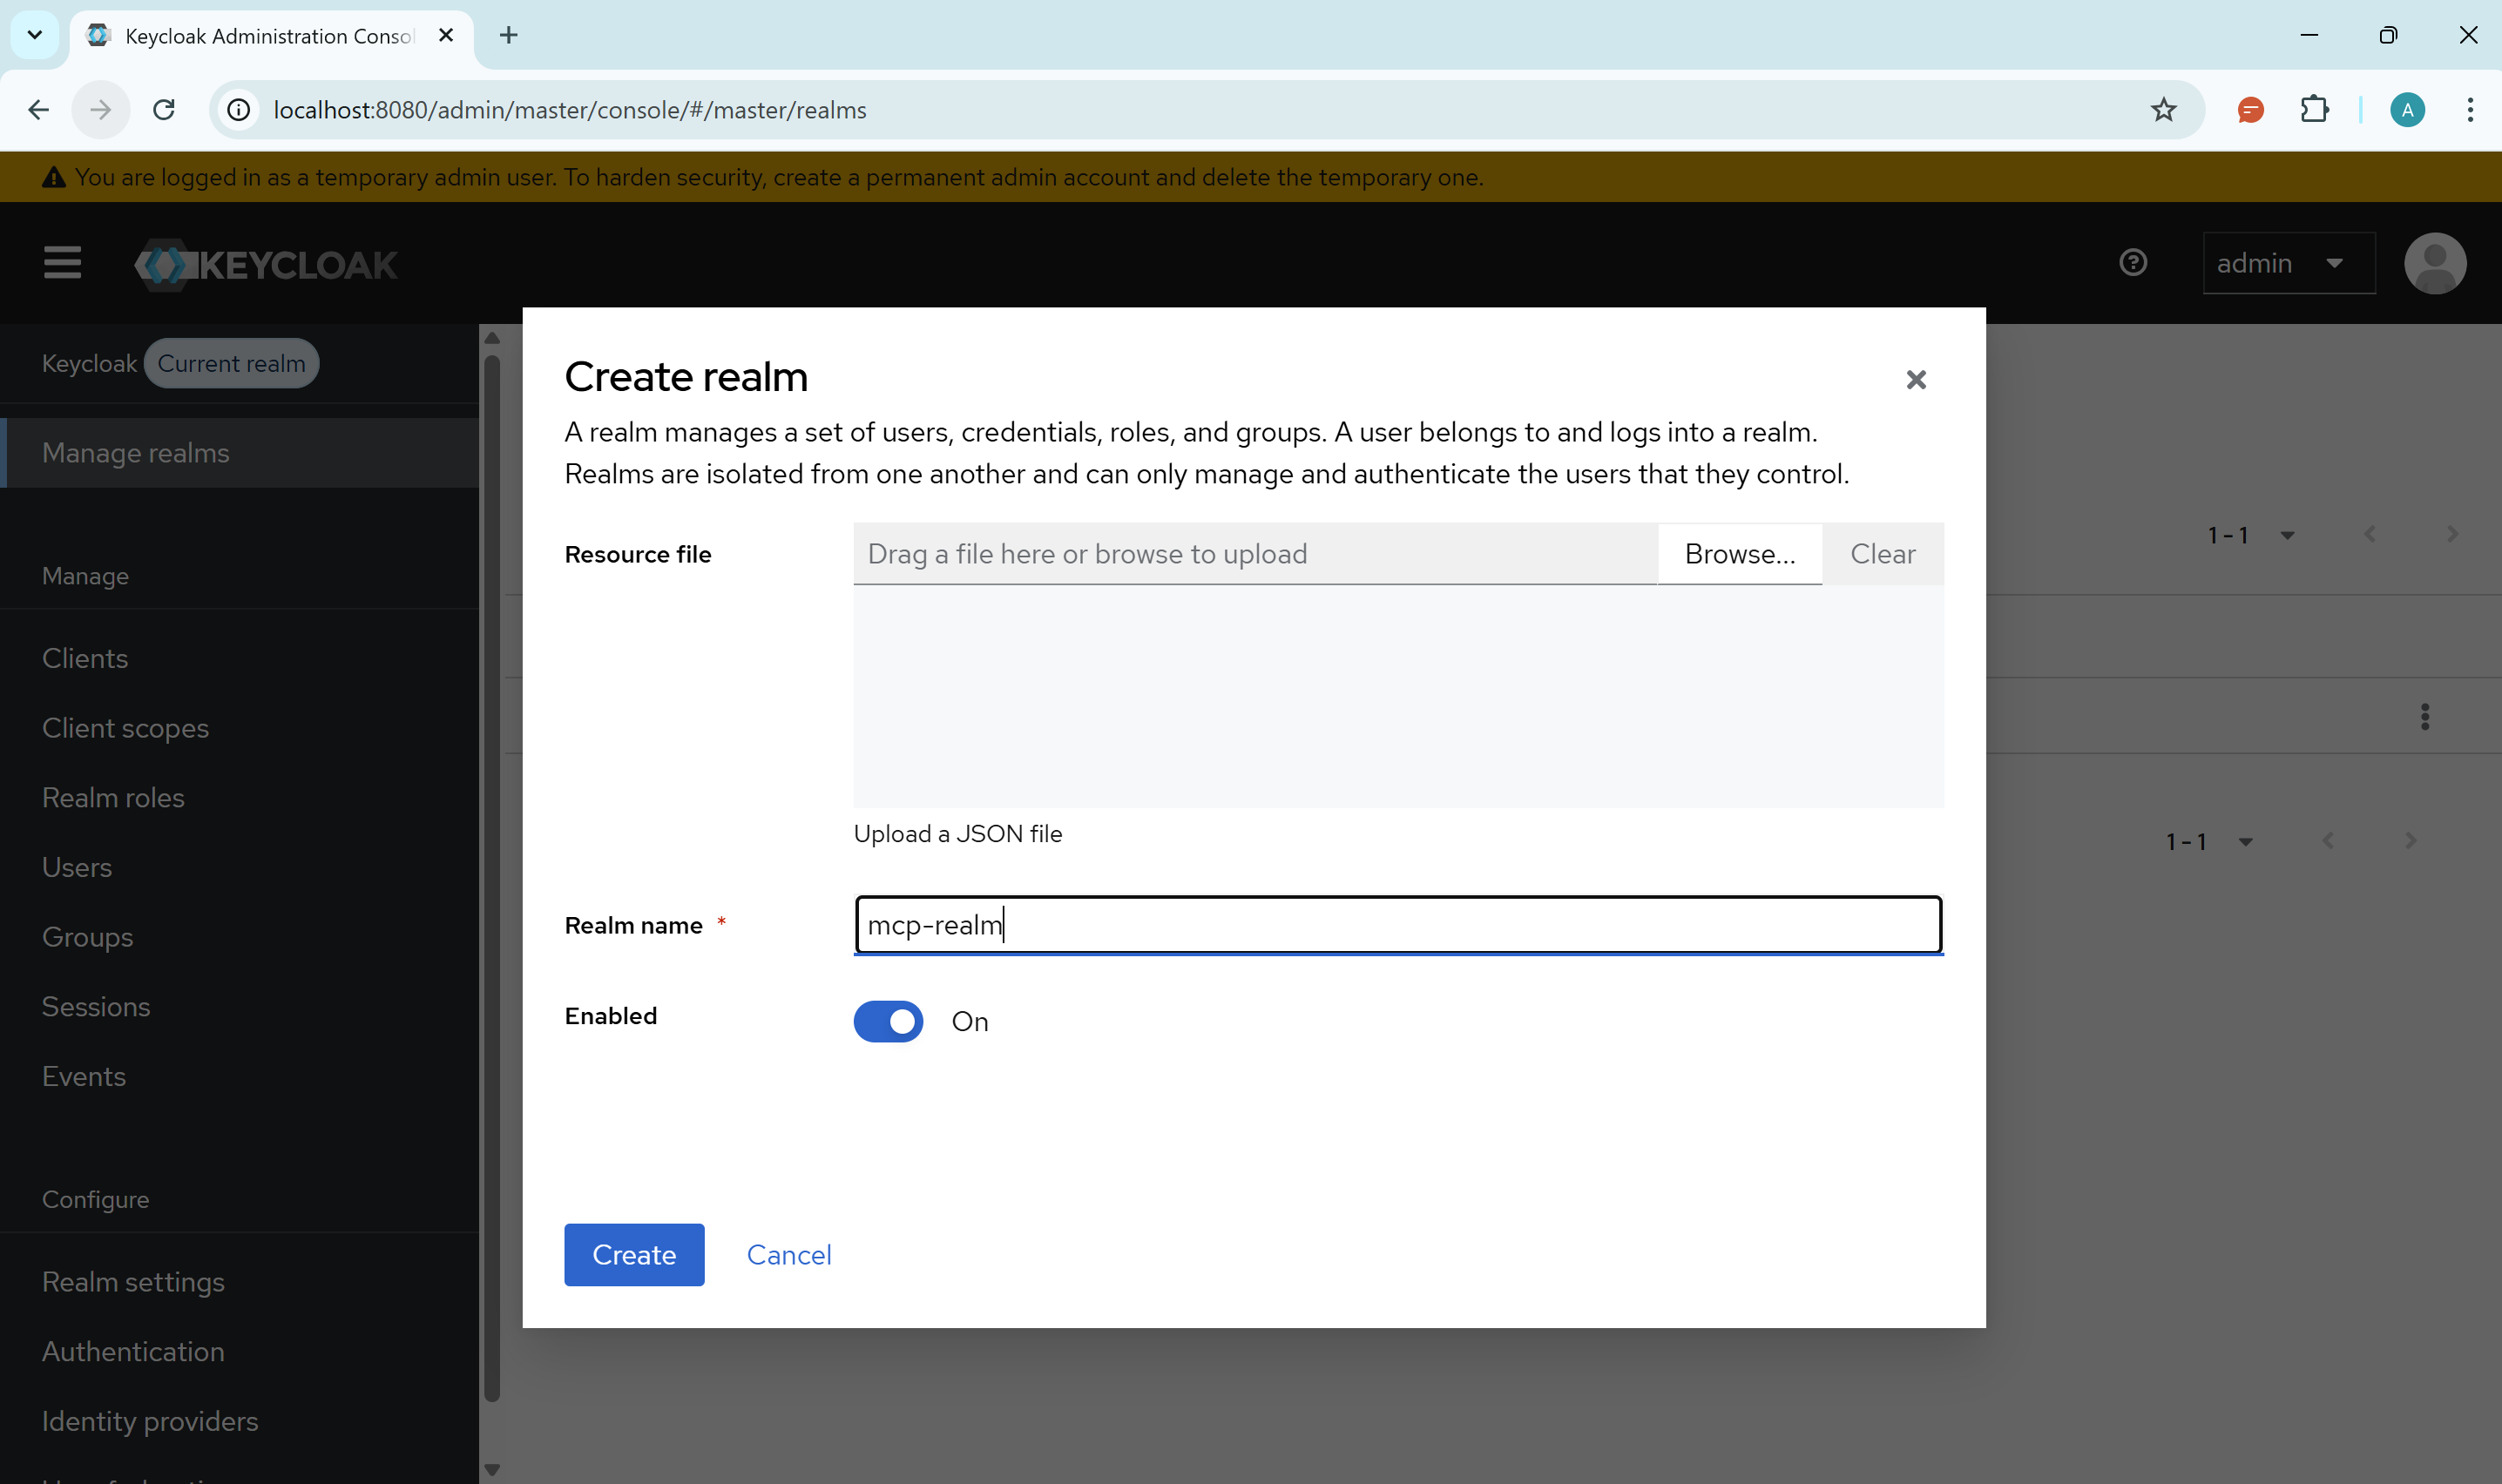
1. Create a Realm
- Click on "Manage realms" in the top-left sidebar
- Click Create realm
- Name it
mcp-realm - Click Create
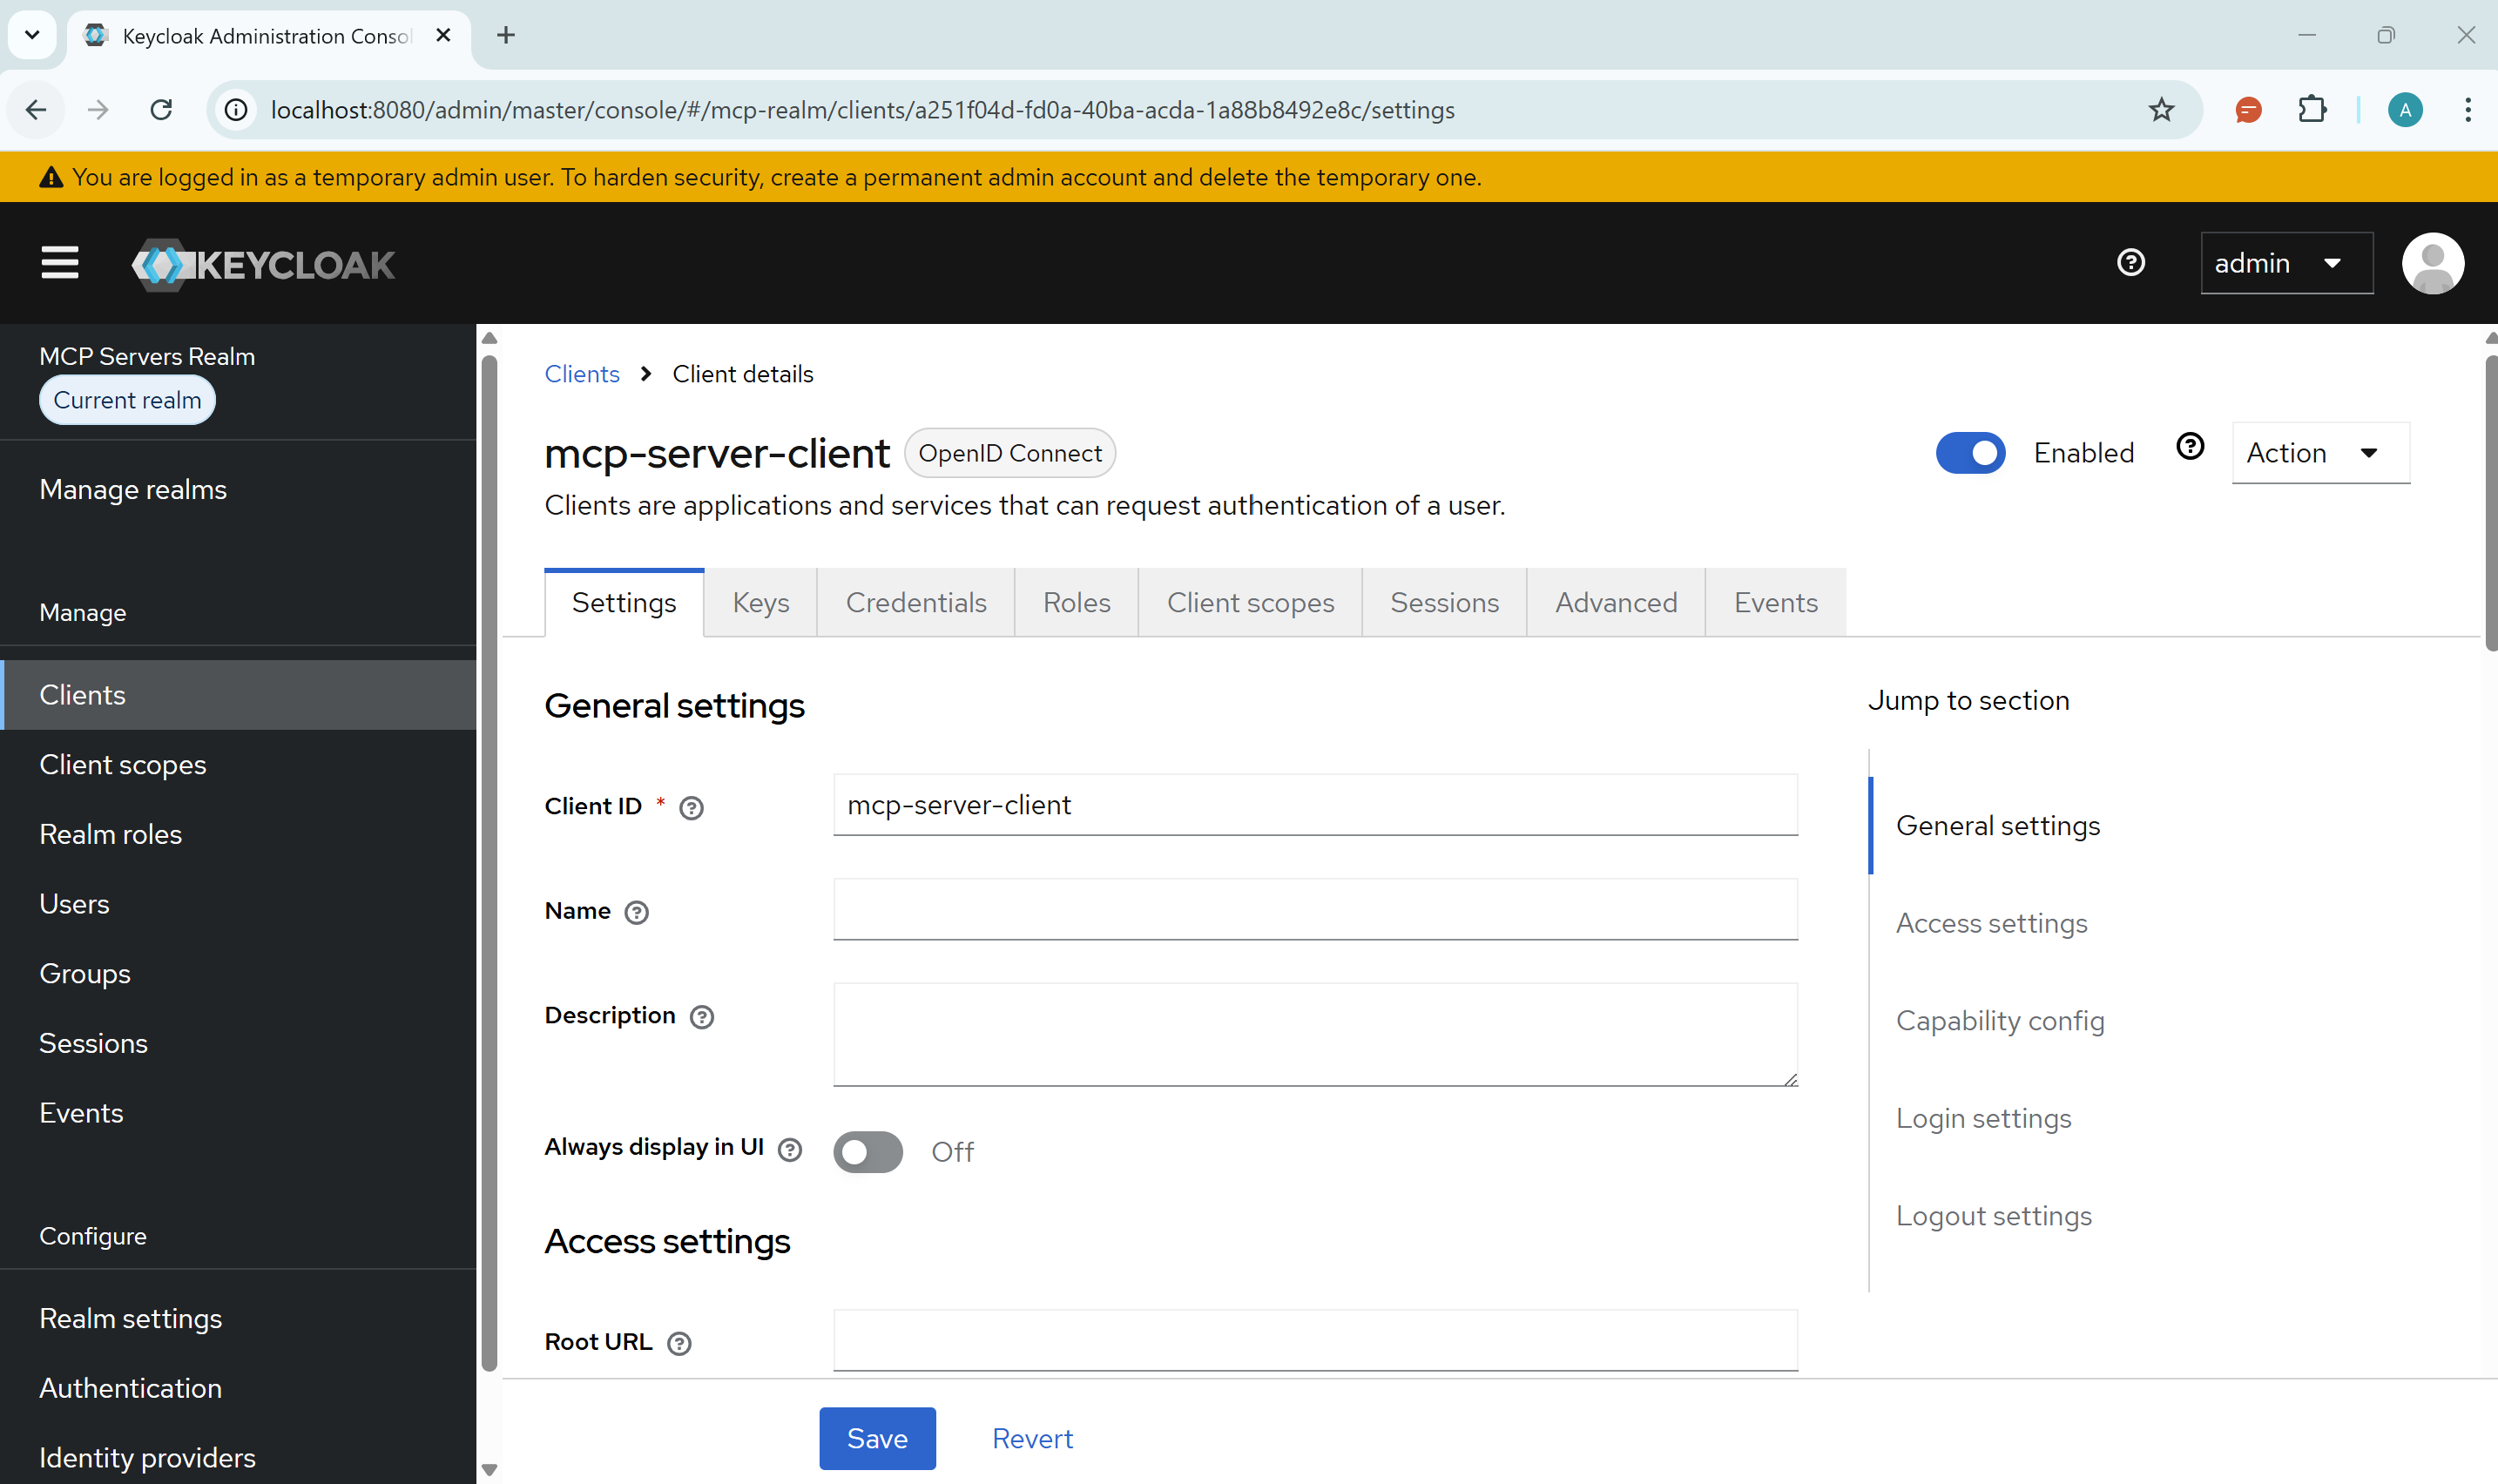
2. Create a Client
- Go to Clients → Create client
- Client ID:
mcp-server-client - Client authentication: Enable (this makes it confidential)
- Leave redirect URIs empty (we'll update later if needed)
- Click Save
Environment Variables
Update/create your .env file with the Keycloak values:
PORT=3000

OAUTH_ISSUER_URL=http://localhost:8080/realms/mcp-realm
OAUTH_AUDIENCE= #leave empty for Keycloak
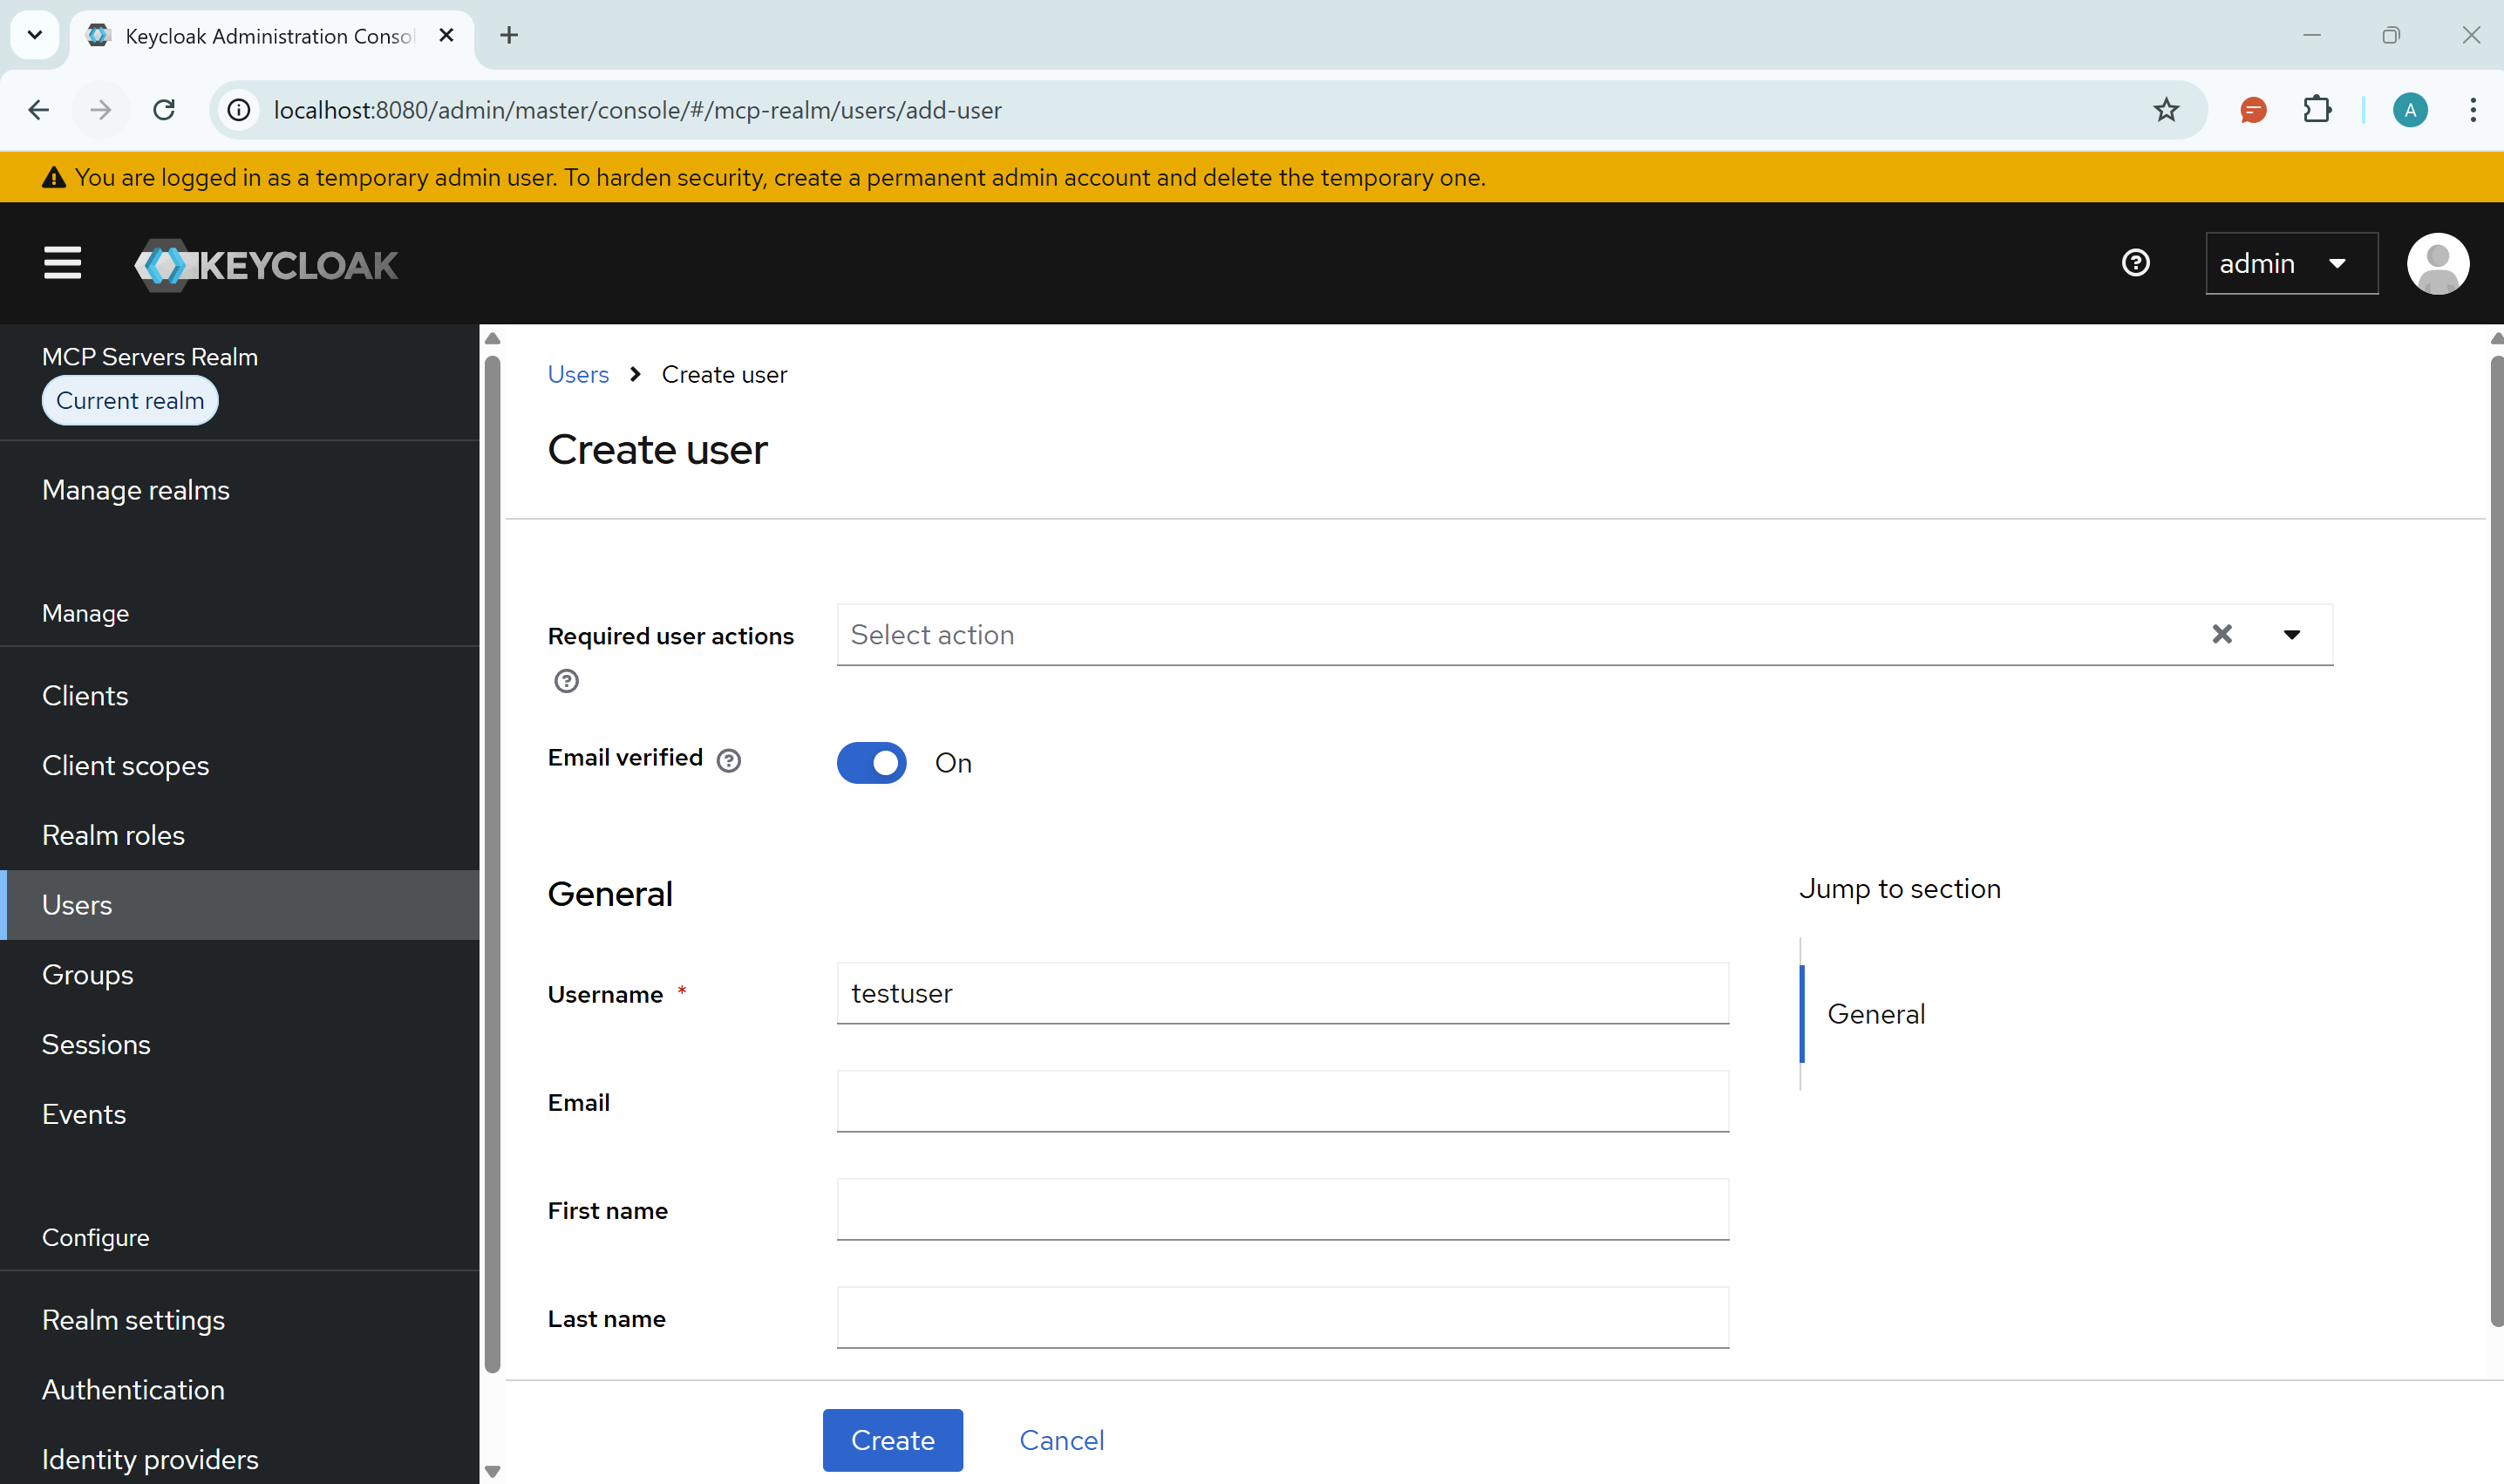
3. Create a Test User
- Go to Users → Add user
- Username:
testuser - Set Email verified to ON
- Click Create
- Go to Credentials tab → Set password
- Enter a password and disable "Temporary"
Connecting MCP Server to Keycloak
With Keycloak running and your .env configured, start your MCP server:
npm run dev
You should see output like:
[auth] Validating OAuth configuration for issuer: http://localhost:8080/realms/mcp-realm
[auth] Successfully fetched OIDC discovery document
[auth] Authorization endpoint: http://localhost:8080/realms/mcp-realm/protocol/openid-connect/auth
[auth] Token endpoint: http://localhost:8080/realms/mcp-realm/protocol/openid-connect/token
[auth] JWKS URI: http://localhost:8080/realms/mcp-realm/protocol/openid-connect/certs
[auth] JWKS endpoint is accessible
[auth] OAuth configuration validated successfully
MCP Stateful HTTP Server listening on port 3000
OAuth metadata available at http://localhost:3000/.well-known/oauth-protected-resource
The auth middleware automatically:
- Intercepts incoming requests
- Extracts the Bearer token from the Authorization header
- Validates the token against Keycloak's JWKS endpoint
- Rejects requests with invalid or missing tokens
Your server is now protected. Unauthenticated requests will receive a 401 Unauthorized response.
Testing Your Secure MCP Server
Let's verify everything works. We'll test with three methods: VS Code integration, Cursor integration, and a terminal client.
Setting Redirect URIs for VS Code and Cursor
- In Keycloak, go to Clients → mcp-server-client → Settings
- Under Valid Redirect URIs, add the following URIs:
cursor://anysphere.cursor-mcp/oauth/callback
https://vscode.dev/redirect/*
http://127.0.0.1:33418/* # this may vary based on your setup
- Click Save
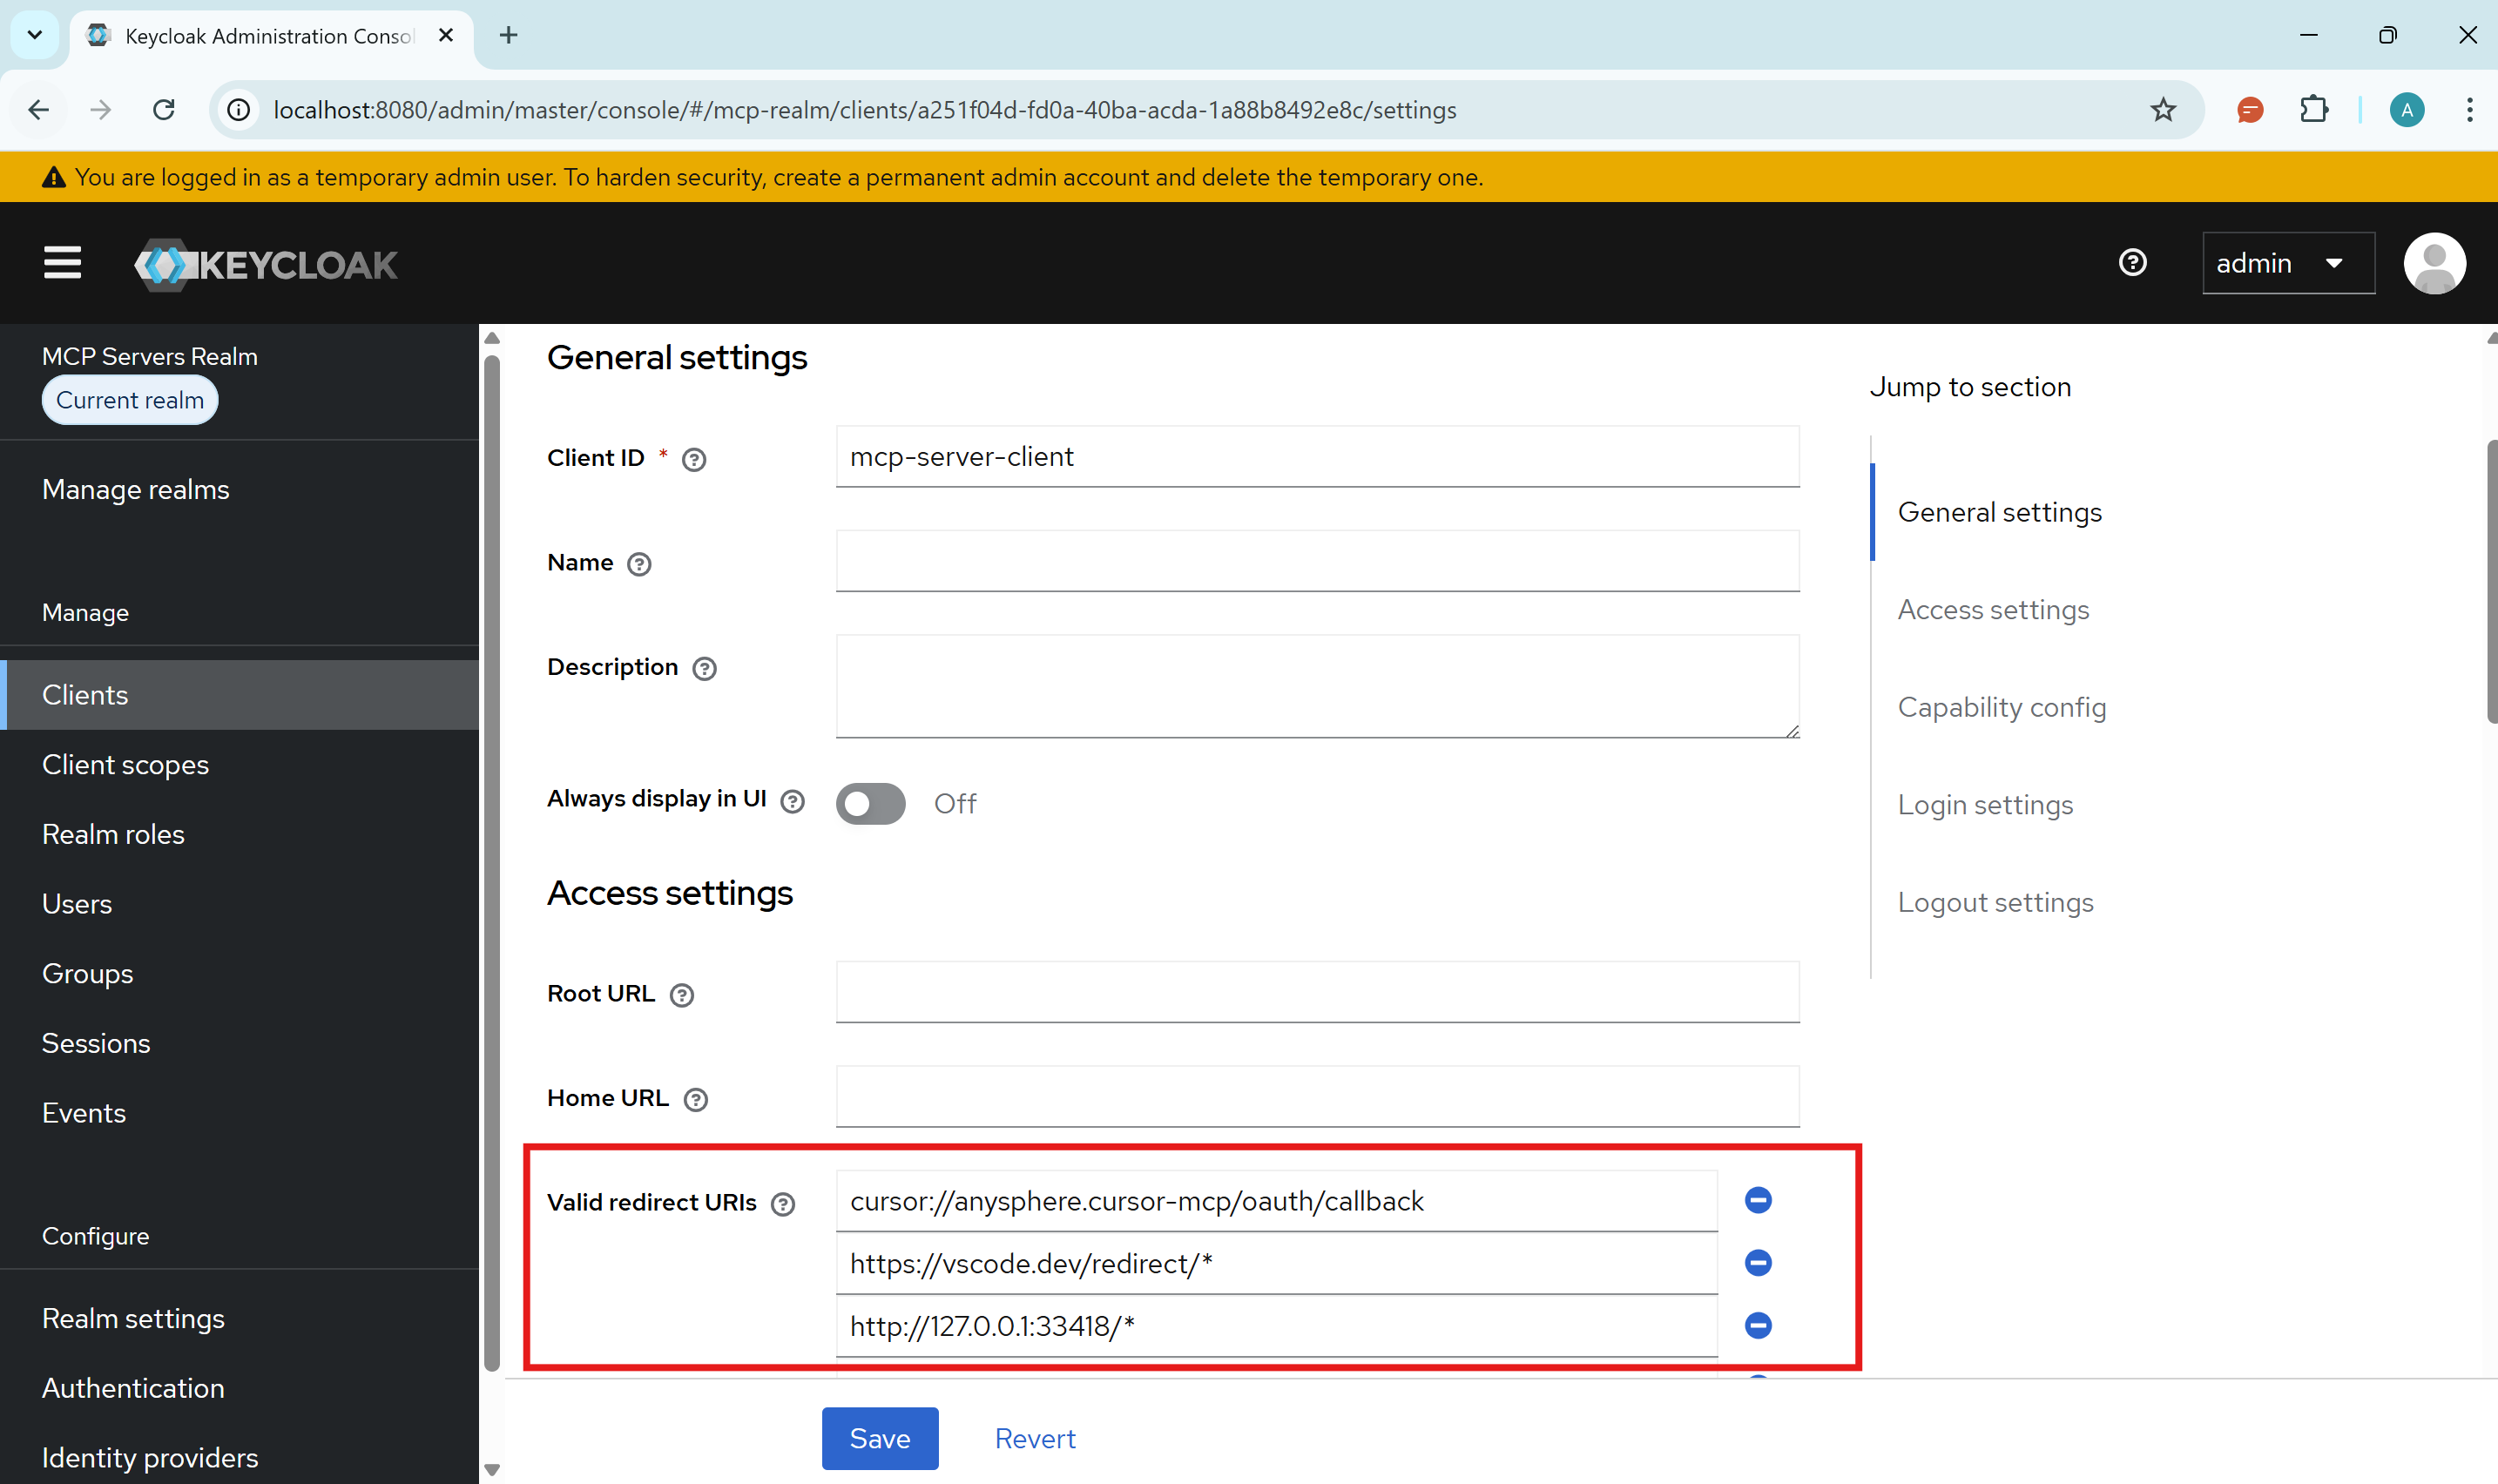
Note: If you have an error of "Invalid redirect URI", double-check the URIs match exactly or add missing ones.
VS Code Integration
VS Code supports MCP servers with OAuth authentication. Create a .vscode/mcp.json file in your project:
{
  "servers": {
    "my-secure-mcp-server": {
      "type": "http",
      "url": "http://localhost:3000/mcp"
    }
  }
}
On top of the server name you'll see "Start":
- VS Code will try to connect to your MCP server
- If it detects OAuth, it initiates the authorization flow
- If DCR is supported, it registers the client dynamically, otherwise it will prompt you to enter client details
- You log in with your Keycloak credentials
- VS Code receives the token and connects to your server
Your MCP tools are now available through VS Code's Copilot.
Cursor Integration
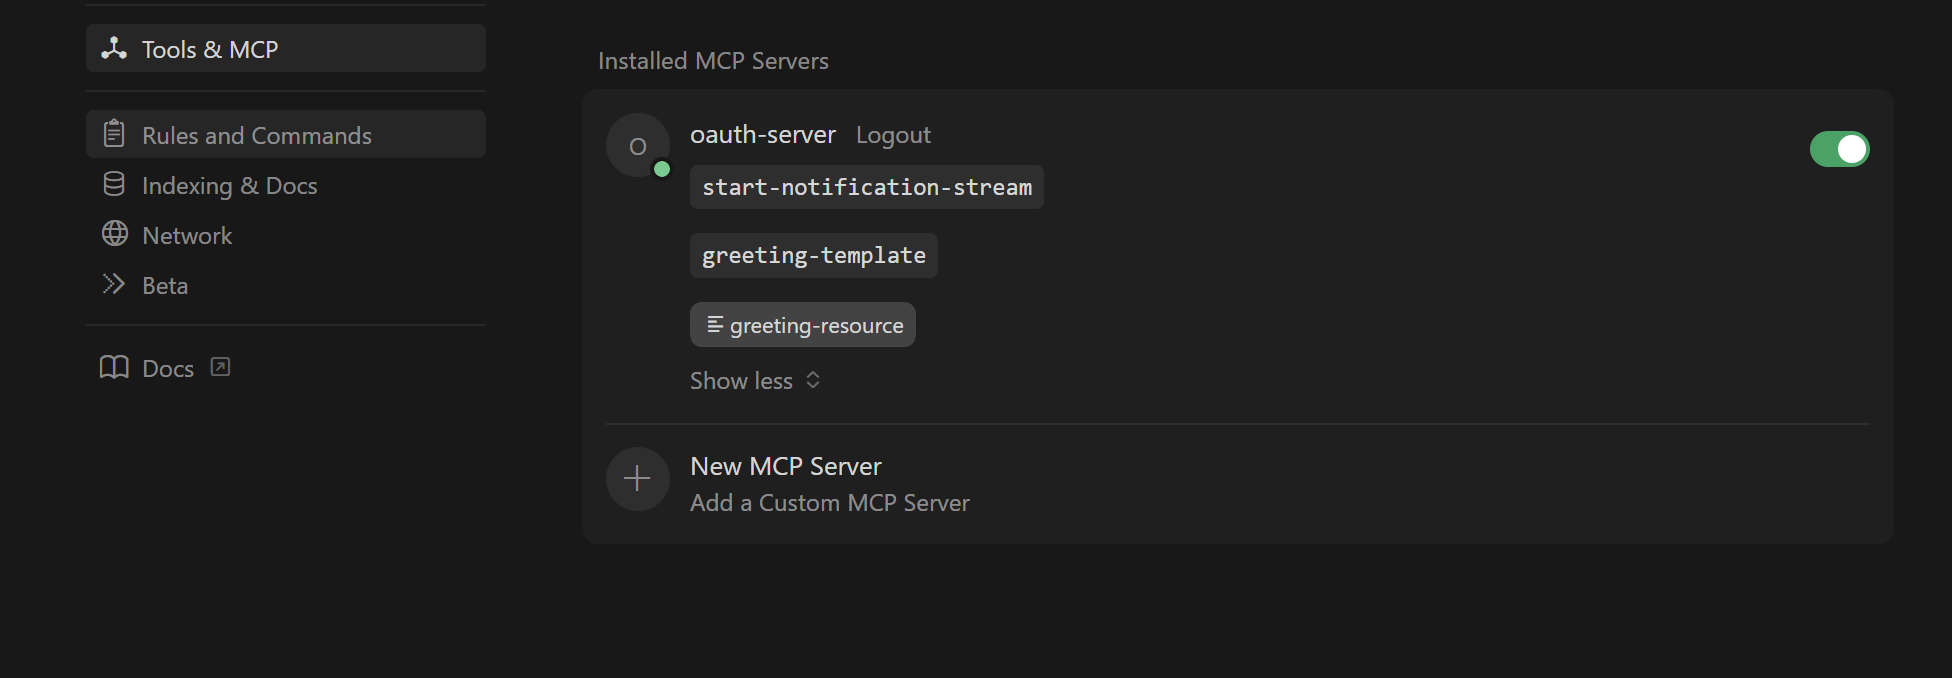
Cursor also supports MCP with OAuth. In Cursor, add a new MCP server:
Go to Cursor settings → Tools & MCP → New MCP Server
Enter the following details:
{
  "mcpServers": {
    "oauth-server": {
      "url": "http://localhost:3000/mcp",
      "auth": {
        "CLIENT_ID": "mcp-server-client",
        "CLIENT_SECRET": "<your-client-secret | EMPTY it's optional>",
        "scopes": ["mcp:tools"]
      }
    }
  }
}
- After saving, go back to Tools & MCP and click on "Connect" next to your new server.
- Cursor will open a browser window for you to log in via Keycloak.
- After logging in, Cursor will receive the access token and connect to your MCP server.
Terminal Client Testing
The terminal client uses Dynamic Client Registration (DCR) to connect to your MCP server. This requires additional Keycloak configuration that wasn't needed for VS Code or Cursor (which use predefined clients).
Enabling Dynamic Client Registration in Keycloak
For DCR to work, Keycloak needs to trust the host where your client is running:
- In Keycloak, go to Clients → Client registration → Trusted Hosts
- Disable the Client URIs Must Match setting
- Add your testing host's IP address to the trusted hosts list
To find your host IP:
- Linux/macOS: Run
ifconfigin your terminal - Windows: Run
ipconfigin Command Prompt
If you're unsure which IP to add, check the Keycloak logs for a line like Failed to verify remote host : 192.168.x.x. That's the IP you need to whitelist.

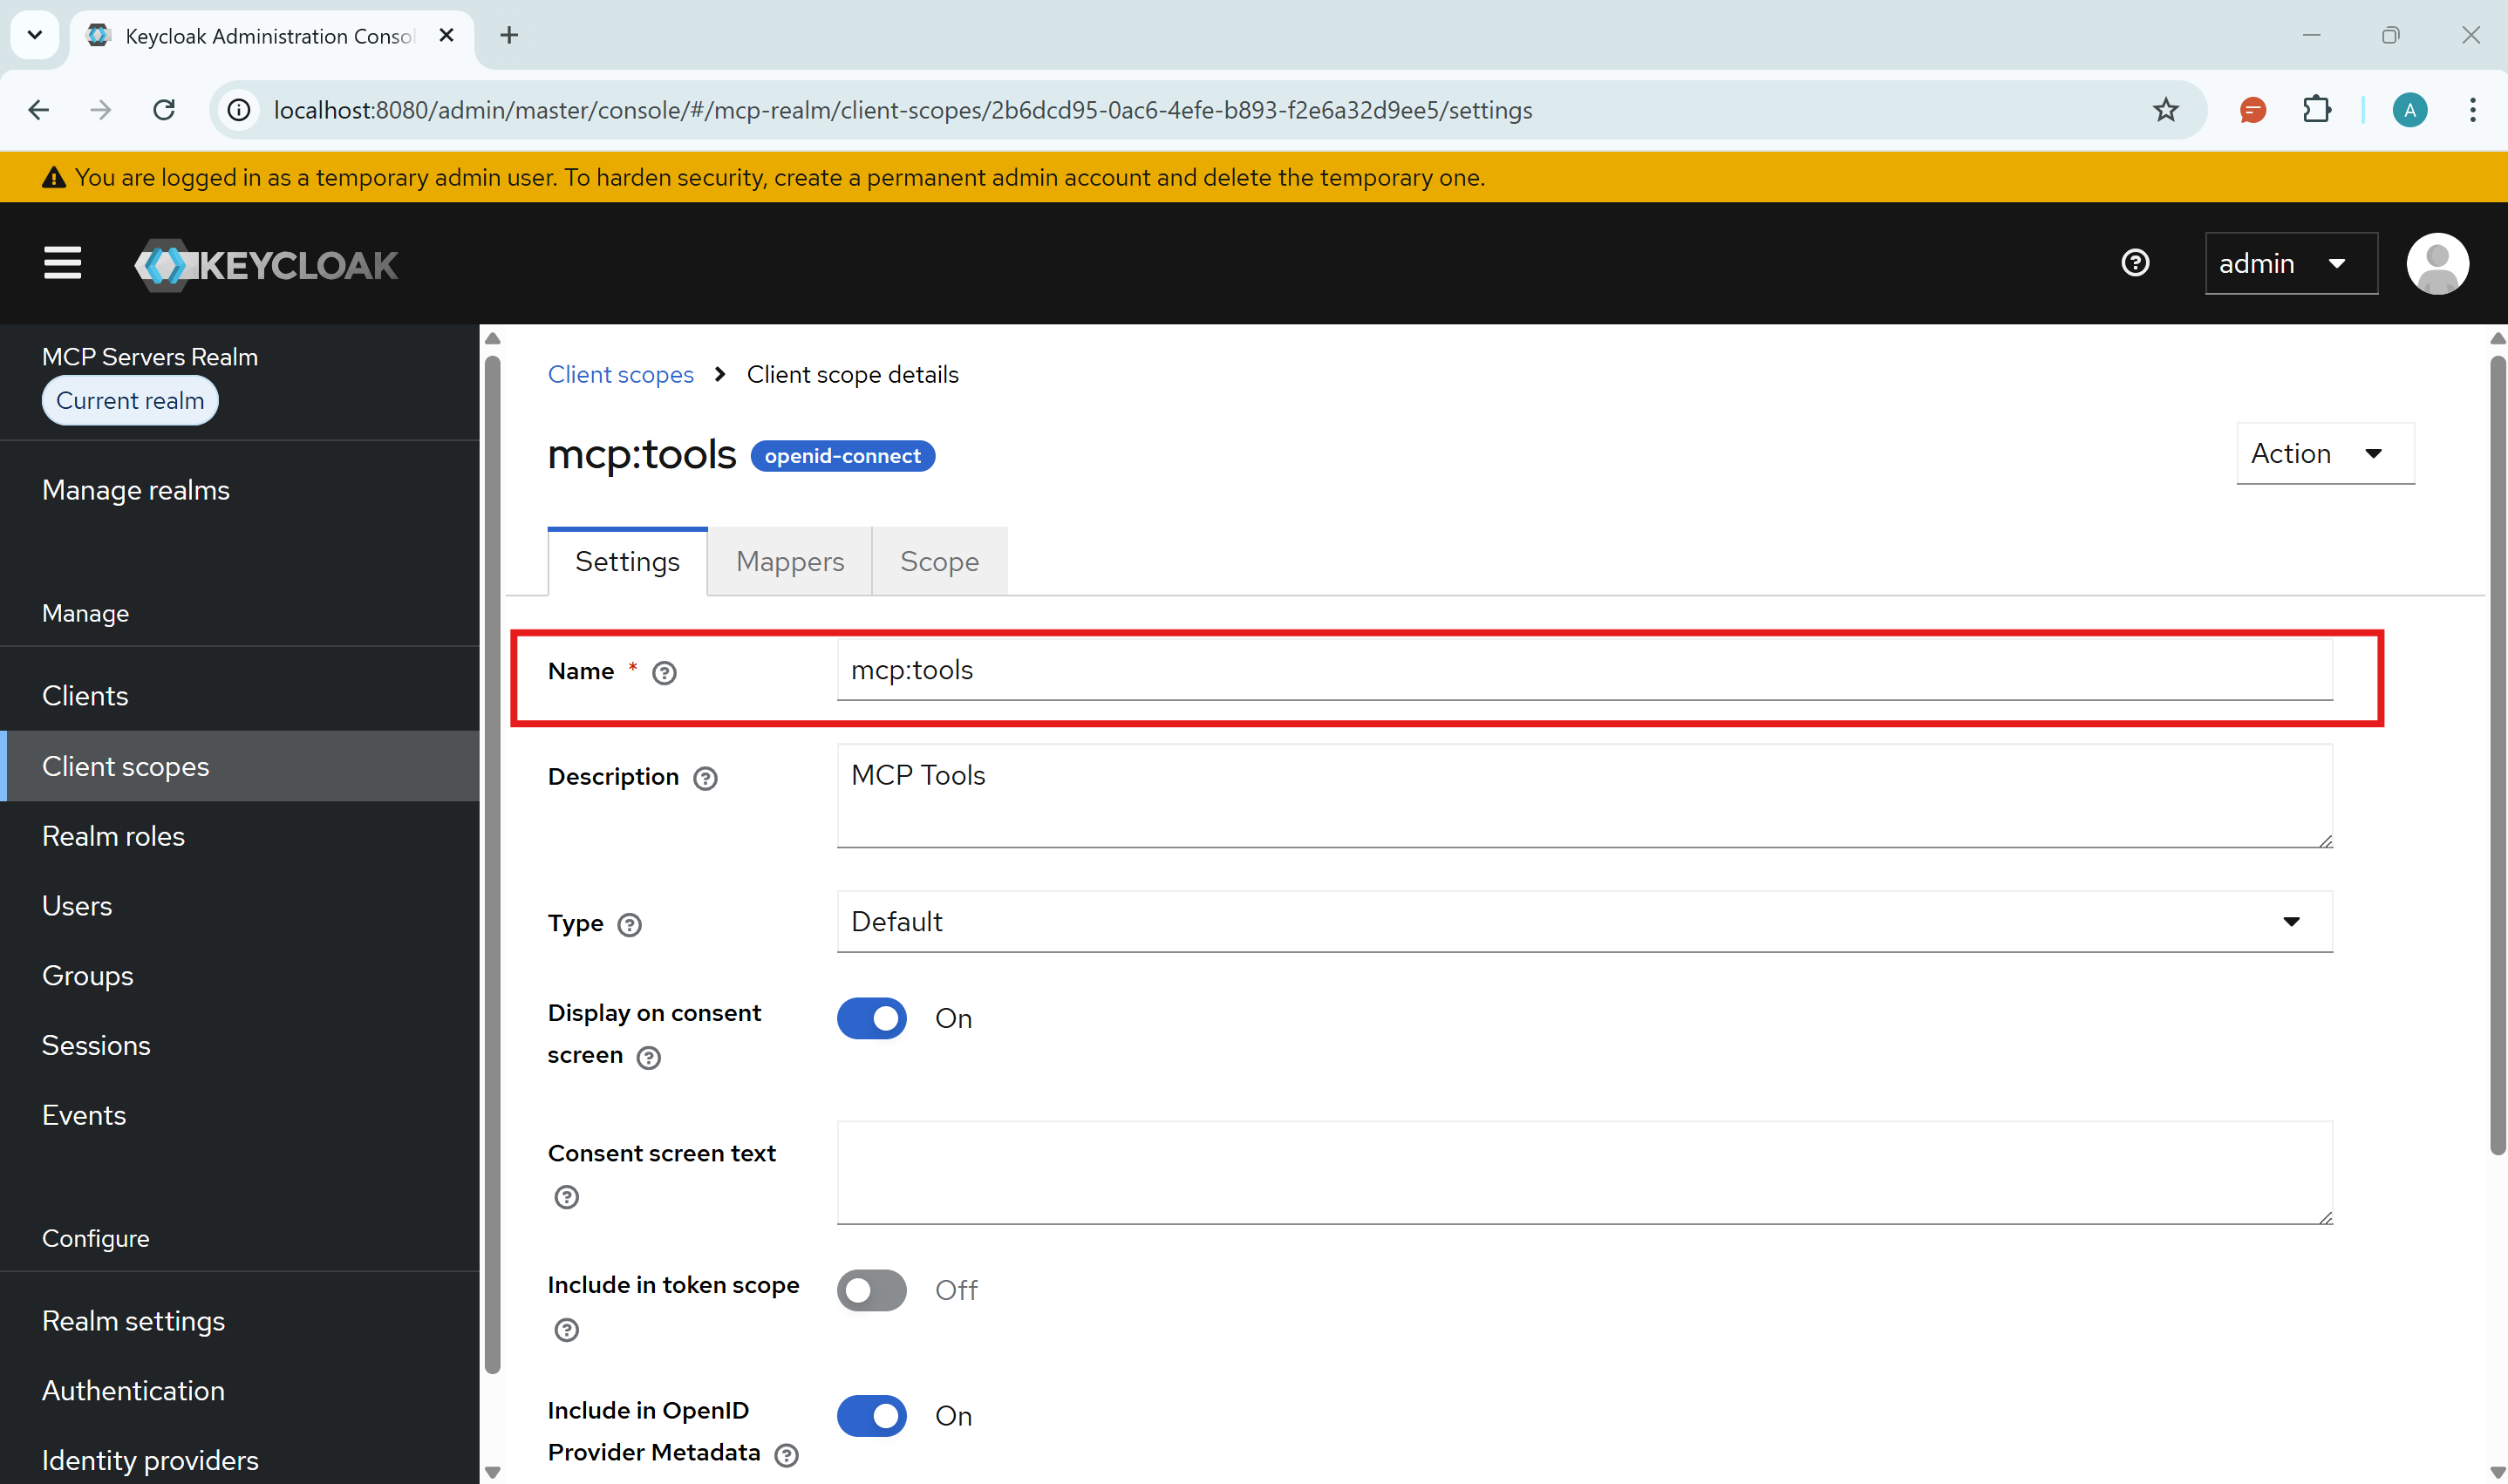
Creating the mcp:tools Scope
The terminal client requires a custom scope to access MCP tools. Without this, authentication will succeed but tool access will fail.
- In Keycloak, go to Client scopes → Create client scope
- Name:
mcp:tools - Type: Set to Default (so it's automatically included)
- Include in token scope: Enable this toggle (required for token validation)
- Click Save
Running the Terminal Client
Now you can test with the mcp-oauth-client:
git clone https://github.com/IBJunior/mcp-oauth-client
cd mcp-oauth-client
npm install
npm run build
Configure the client with your server and Keycloak details, then run:
npm run dev
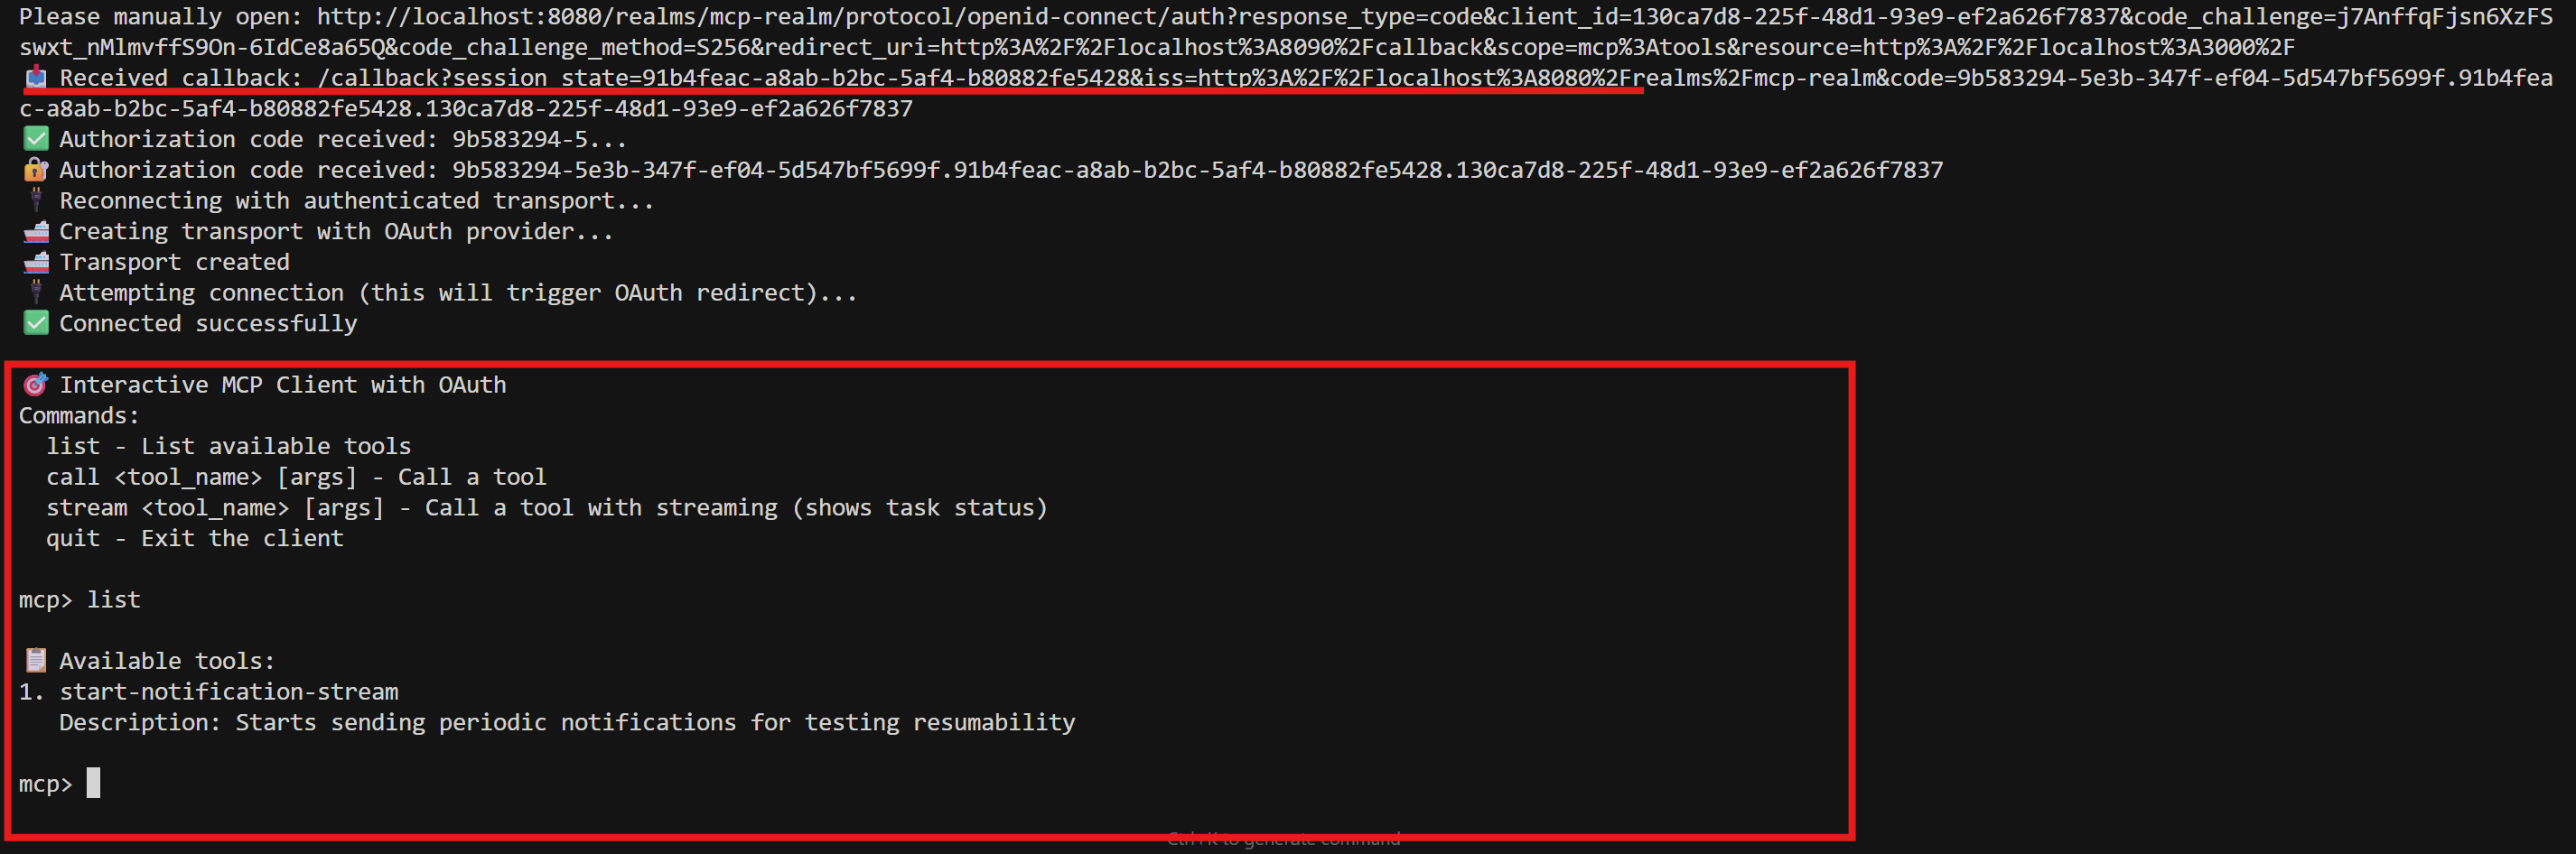
The client will:
- Use DCR to register itself with Keycloak automatically
- Perform the OAuth flow
- Obtain an access token (if the browser doesn't open automatically, copy-paste the URL from the console)
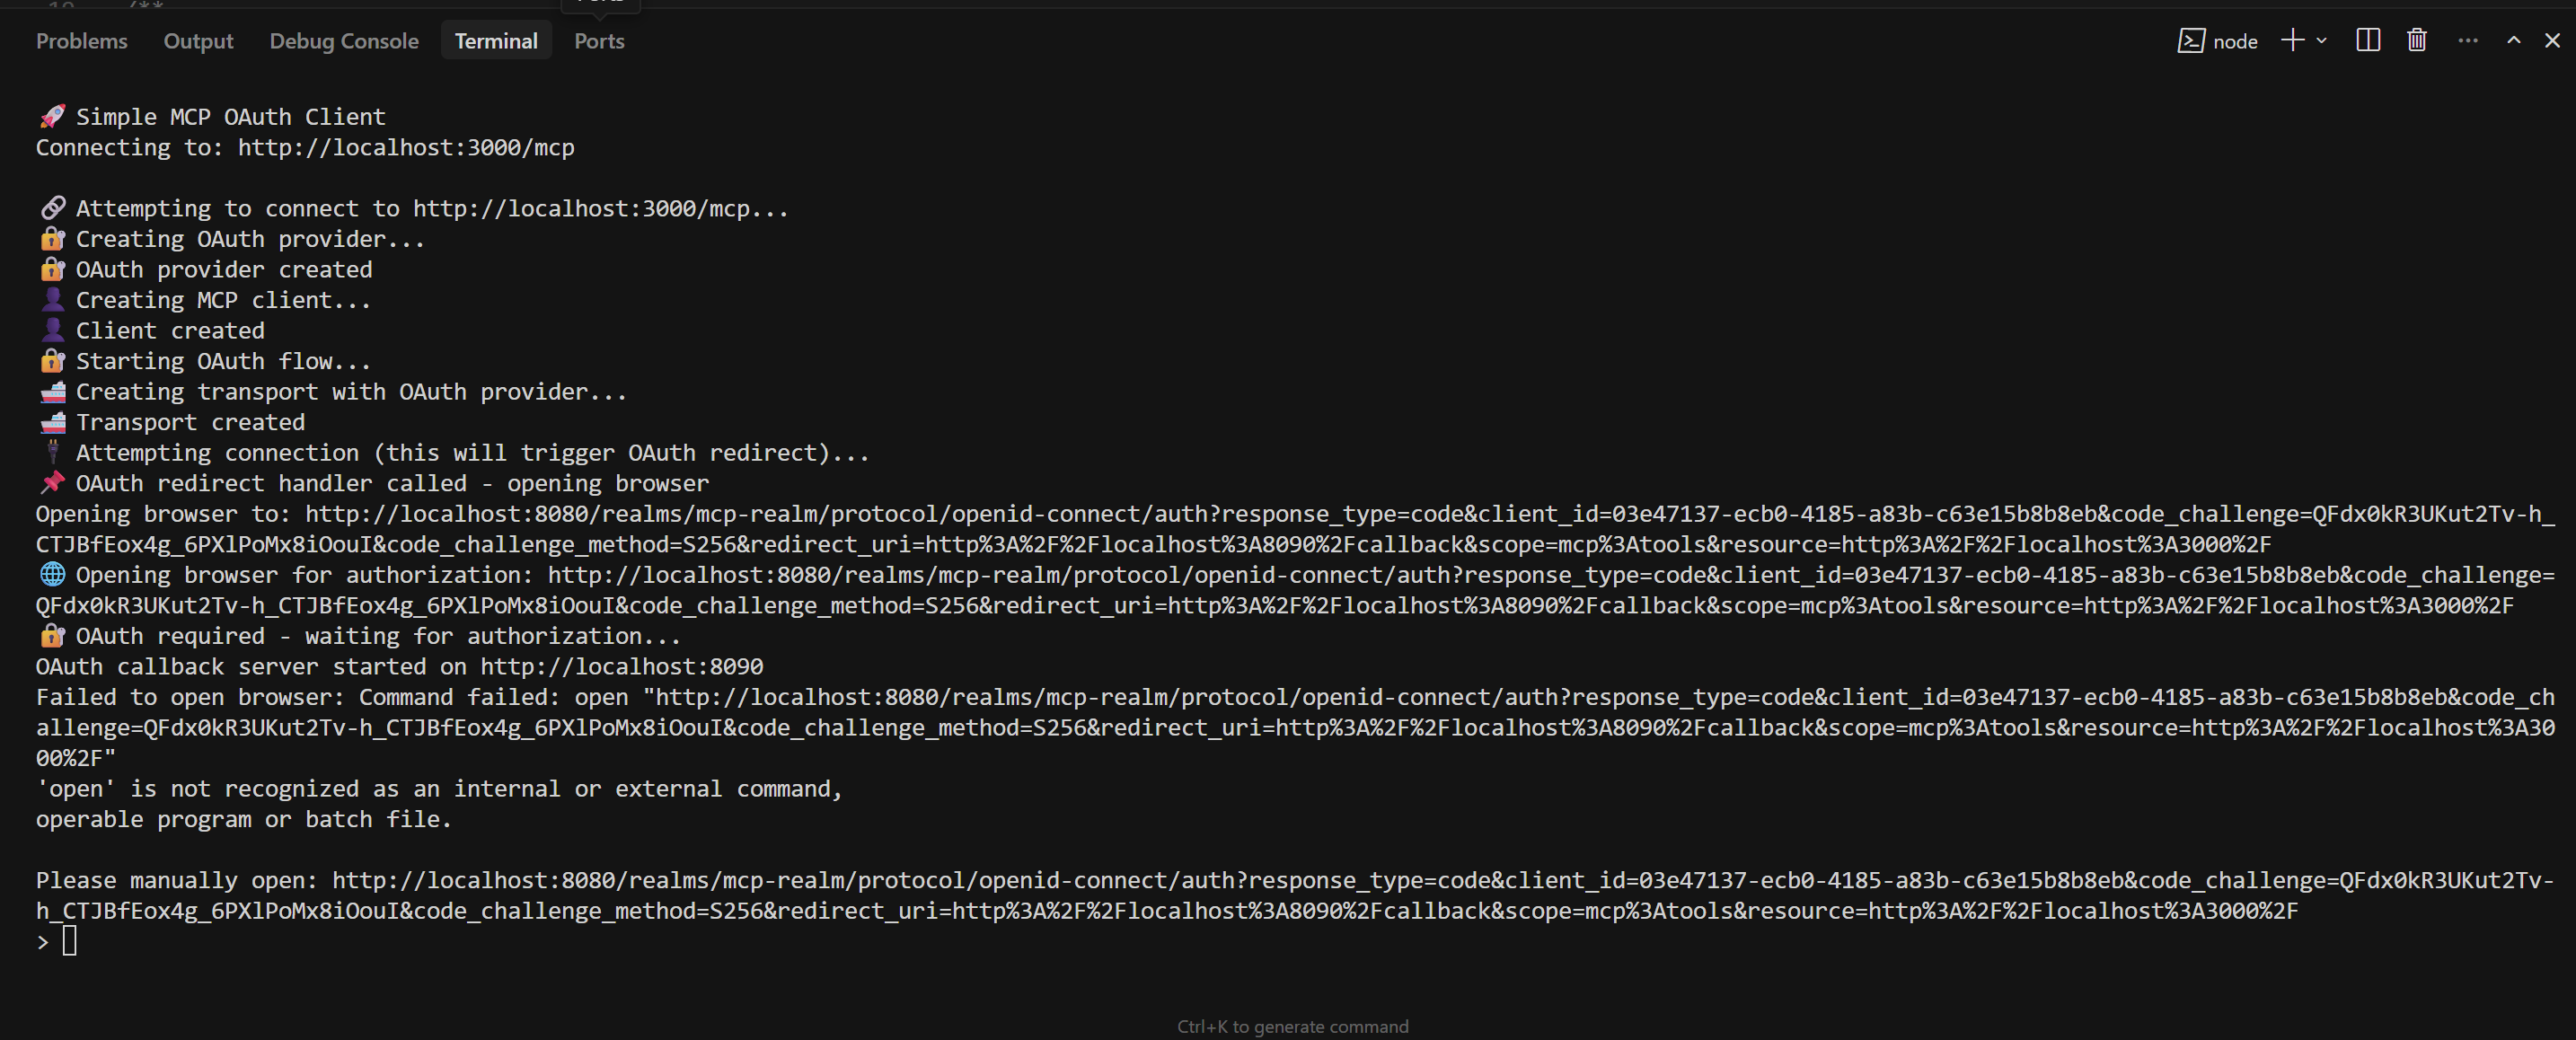
- Connect to your MCP server
- List available tools
- Allow you to invoke tools interactively
This is useful for debugging and verifying your setup works end-to-end.
Adding Custom Tools
The scaffolded server comes with example tools. Let's add a custom one to see how easy it is.
Open src/server.ts and add a new tool:
server.registerTool(
  'greet',
  {
    description: 'Greets a user in their preferred language.',
    inputSchema: {
      name: z.string().describe("The user's name"),
      language: z.enum(['en', 'es', 'fr']).optional().describe('Greeting language'),
    },
  },
  async ({ name, language = 'en' }) => {
    const greetings = {
      en: `Hello, ${name}! Welcome to the secure MCP server.`,
      es: `¡Hola, ${name}! Bienvenido al servidor MCP seguro.`,
      fr: `Bonjour, ${name}! Bienvenue sur le serveur MCP sécurisé.`,
    }

    return {
      content: [
        {
          type: 'text',
          text: greetings[language],
        },
      ],
    }
  }
)
That's it. Restart your server and the new tool is available, automatically protected by OAuth. No additional authentication code required per tool. The middleware handles everything at the request level.
Using MCP Inspector
MCP Inspector is a debugging UI for MCP servers. It lets you explore available tools, test invocations, and inspect responses.
The scaffolded project includes an inspect script:
npm run inspect
Important caveat: For authenticated servers, you'll need to manually setup the oauth flow in MCP Inspector.
Recap
Let's summarize what we've covered:
| What | Why |
|---|---|
| MCP Authorization | Industry standard for securing MCP servers |
| OAuth 2.1 + PKCE | Modern, secure token-based authentication |
| Dynamic Client Registration | Allows any MCP client to connect without manual setup |
| Keycloak | Open-source, OIDC-compliant, supports DCR |
| create-mcp-server | Fast scaffolding with authentication built-in |
| OIDC abstraction | Swap providers via environment variables |
The key insight: security doesn't have to be complicated. With the right tools and a clear understanding of the concepts, you can go from zero to a production-ready, authenticated MCP server in minutes.
Conclusion
You've built a production-ready MCP server with OAuth authentication. Your tools are protected, tokens are validated, and you're following the MCP Authorization specification.
But here's the best part: Keycloak is just one option.
Because create-mcp-server uses a provider-agnostic OIDC implementation, you can swap Keycloak for any compliant provider. Just update your environment variables and you're done. That's the power of standards-based authentication.
A note on production deployments: The Keycloak configuration in this guide is designed for demonstration purposes. A production setup requires additional hardening: HTTPS everywhere, stricter redirect URI validation, token lifetime tuning, proper realm and client policies, and more. For production-grade configuration, refer to the official Keycloak documentation.
Next Steps
- Star create-mcp-server on GitHub
- Contribute to create-mcp-server
- Explore the mcp-oauth-client for testing
Resources
- MCP Authorization Specification
- Understanding Authorization in MCP (Tutorial)
- create-mcp-server GitHub
- mcp-oauth-client
- Keycloak Documentation
Related Articles
AGENT BRIEFINGS
Stay measured as the field moves.
What actually matters for building and scaling AI agents in production — and what's just hype. Straight from the work, no filler.
$ subscribe agent-briefings
→ what works in production, what doesn't.
→ frameworks, MCP, evals, managed services.
→ signal over hype.